How to Prevent Freezer Burn: Tips to Keep Food Fresh
Learn how to prevent freezer burn with simple tips. Keep your food fresh and delicious by mastering how to prevent freezer burn today!
Love This Article?
Get personalized meal plans with recipes like this, automatically matched to your nutrition targets.
How to Prevent Freezer Burn: Tips to Keep Food Fresh
Let's be real—we've all pulled a steak from the freezer that looked like it barely survived a prehistoric ice age. We've all felt that pang of disappointment. Knowing how to prevent freezer burn is a kitchen superpower, and it all boils down to one simple truth: air is the enemy. Proper packaging is your shield.
So, What Is That Frosty Mess, Anyway?
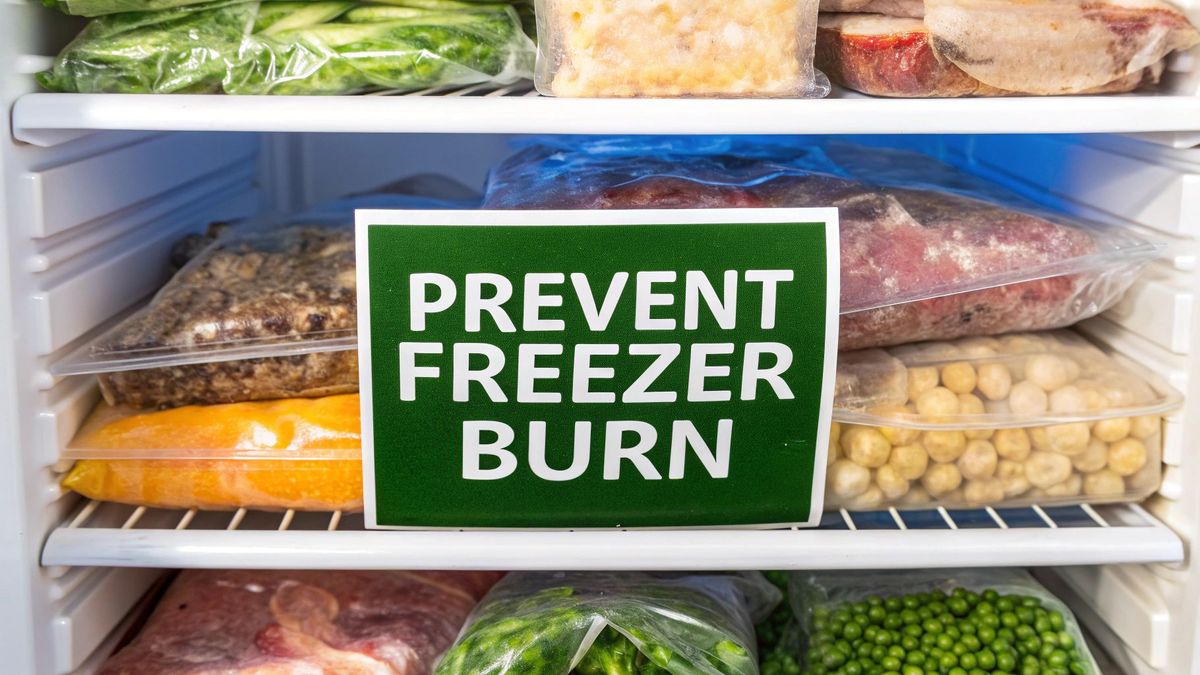
You know the scene. You’re psyched for that chili you batch-cooked last month, but when you pull it out, it’s covered in a crust of icy crystals. That, my friends, is freezer burn, the ultimate villain of meal prep.
So what's actually going on here? It’s a process called sublimation. That's just the fancy scientific term for when the water molecules in your food make a great escape. Instead of keeping your chicken breast plump and juicy, they turn straight into a gas, wander around the package, and then refreeze on the surface. The result? Those gross, unappetizing ice crystals that signal doom for your dinner.
The Science Behind the Frost
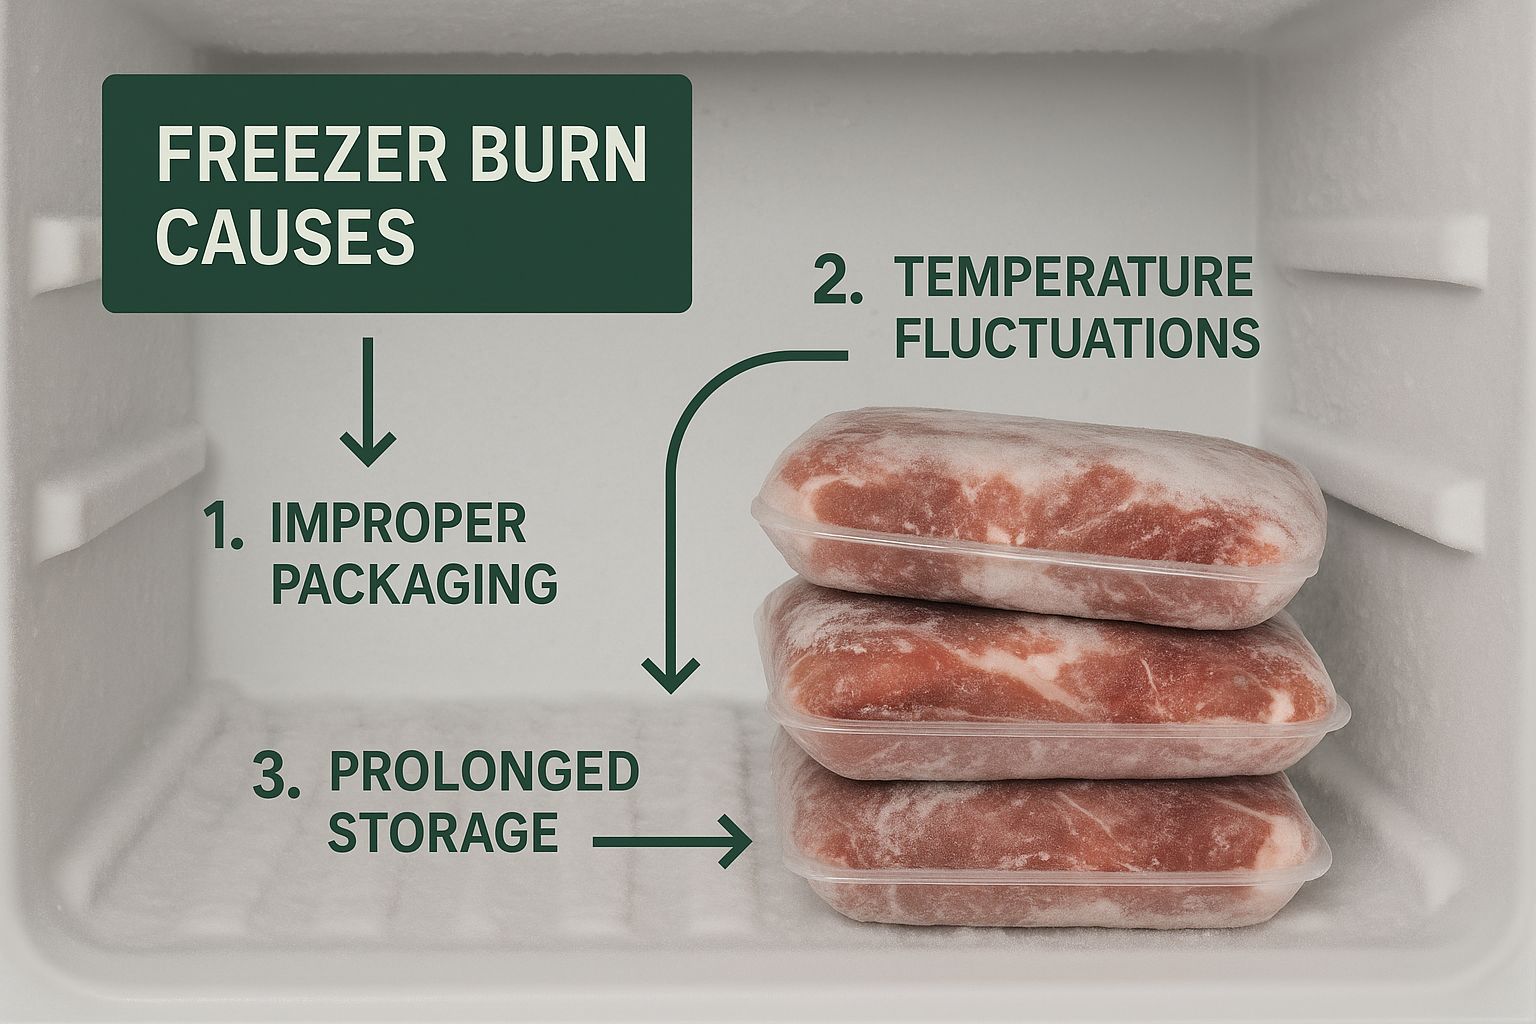
At its core, freezer burn is just moisture loss. Water molecules migrate from your food to the coldest spots in the freezer—like the walls or other packages. This migration gets a major speed boost from two things: shoddy wrapping and temperature swings above 0°F (-18°C). This is what creates those dry, grayish-brown patches on your steak. For a deeper dive into the nitty-gritty science, the Library of Congress has a great explanation.
Now, the good news is that the food is still perfectly safe to eat. The real victim here is quality.
Freezer burn is a flavor thief, not a health risk. It robs your food of texture and taste, turning a potentially delicious meal into a tough, bland disappointment.
Think of that freezer-burned steak. It's not a tender filet anymore; it's more like sad, accidental beef jerky. All the moisture that made it delicious has vanished, leaving a dry, chewy mess. Vegetables don't fare much better, often becoming mushy and losing their bright, fresh flavor.
Stopping this food tragedy isn't just about saving your dinner—it's one of the best money-saving hacks in the kitchen. Every discolored pork chop or icy bag of berries is food and cash straight into the trash. When you master preventing freezer burn, you get to enjoy every bit of food you paid for, just the way it was meant to be.
Quick Fixes to Stop Freezer Burn
Before we get into the nitty-gritty of packaging techniques, let's look at a few quick wins. These are the small, easy changes you can make right now to protect your frozen goods. Think of this as your first line of defense against the frost.
| Action | Why It Works | Best For |
| Double Wrap It | Creates an extra barrier against air and moisture. A layer of plastic wrap followed by a freezer bag is a classic combo. | Meats like steaks, chicken breasts, and pork chops. |
| Cool Food First | Putting warm food in the freezer creates steam, which turns into frost. Let it cool completely in the fridge first. | Soups, stews, chilis, and cooked leftovers. |
| Use the Right Size Container | Less empty space means less room for air to circulate and pull moisture from your food. | Anything, but especially liquids and sauces. |
| Squeeze Out All the Air | Air is the enemy! Press as much air as possible out of freezer bags before sealing them shut. | Ground meat, vegetables, fruits, and pre-portioned meals. |
Making these simple actions a habit will drastically reduce the amount of food you lose to the icy clutches of freezer burn. They don't take much time, but the payoff in flavor and savings is huge.
Mastering Your Food Packaging Game
If air is the ultimate enemy in the fight against freezer burn, then proper packaging is your food's personal bodyguard. This is where you go from just tossing things in the freezer to strategically protecting your culinary investments. Forget the flimsy supermarket wrap or just chucking a container in there; it's time to get serious.
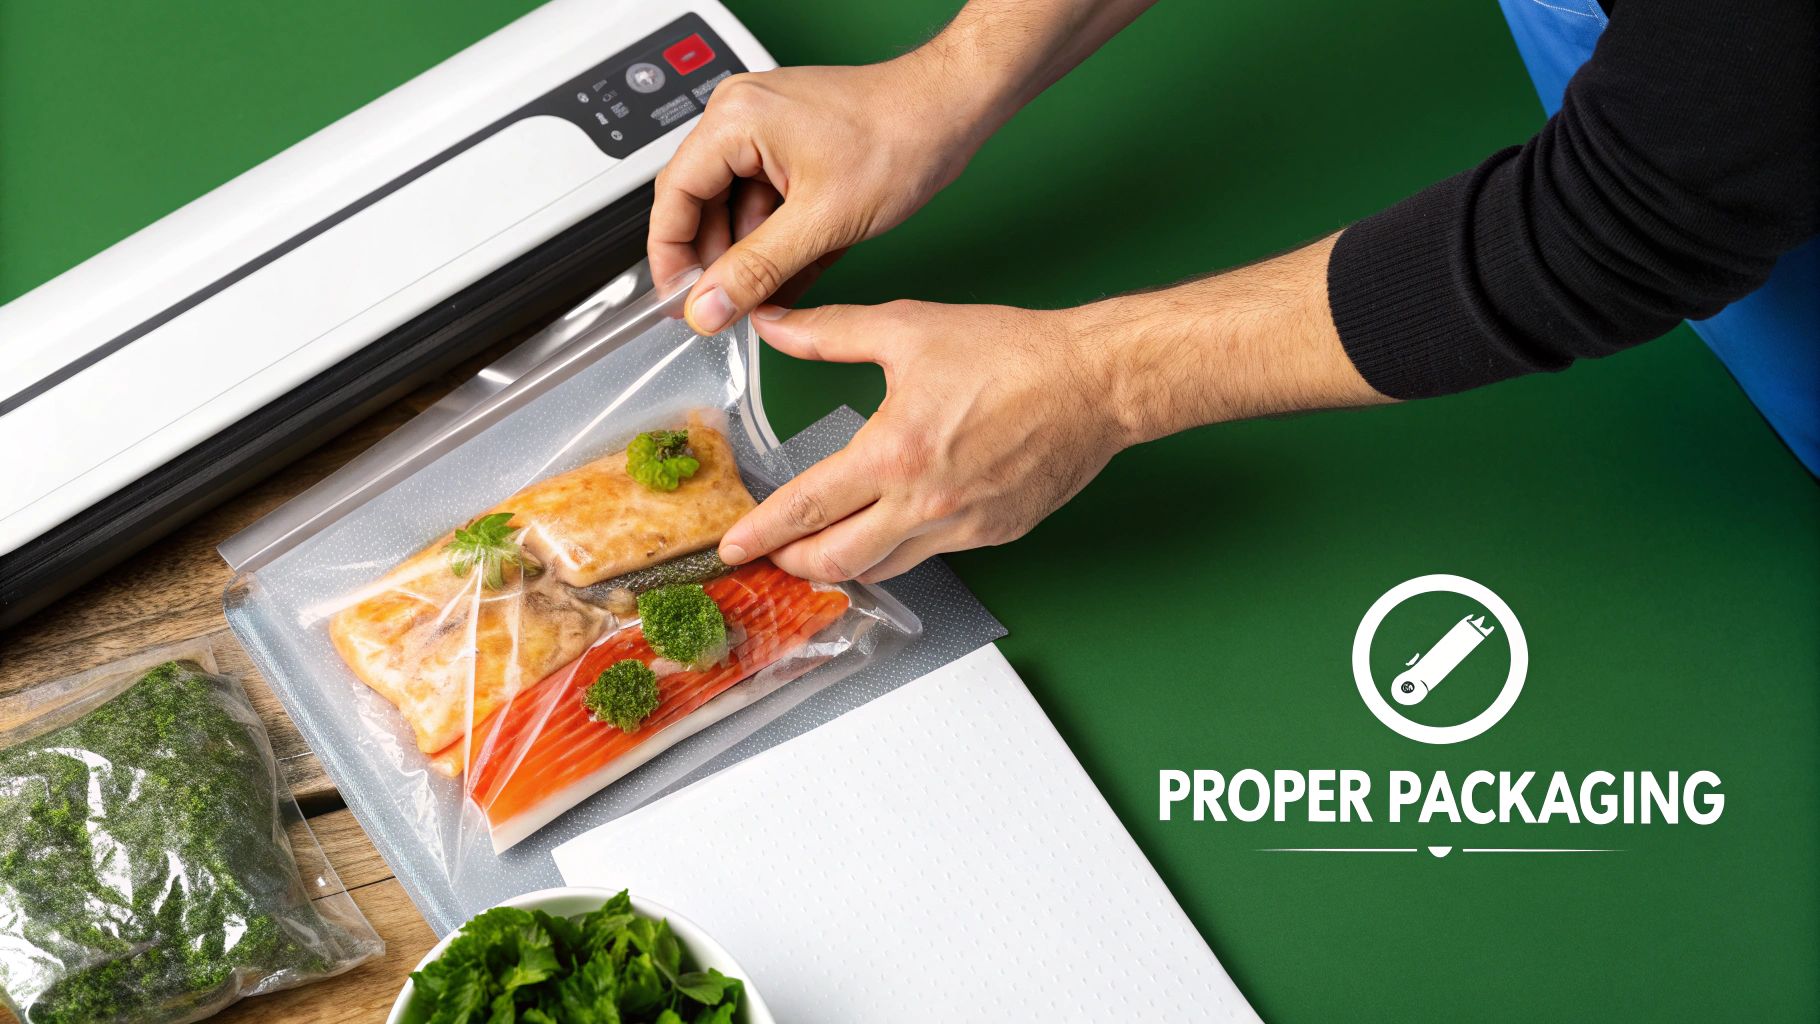
The goal is always, always, always an airtight seal. This is your non-negotiable priority. For things like steaks, pork chops, or chicken breasts, the "double-wrap" method is a classic for a good reason. First, wrap the meat tightly in plastic wrap, pressing out every single air bubble you can find. Then, wrap it again in heavy-duty freezer paper, making sure the shiny side is facing in to create a moisture barrier.
This is a perfect illustration of how easily air can sabotage your food when it's not sealed correctly.
As you can see, those seemingly harmless little air pockets are where all the trouble starts. They become ground zero for sublimation, leading directly to the frosty, discolored patches we all know and hate.
Upgrading Your Wrapping Arsenal
While double-wrapping works well, the undisputed champion of the freezer world is a vacuum sealer. No contest. By physically sucking every last bit of air out of the bag, it creates a perfect, air-free environment for your food. Think of it as putting your food into suspended animation, totally safe from the damaging effects of air and oxidation.
This is especially true for something like ground beef. We’ve all done it: frozen a pound in its original store packaging, only to pull it out and find the edges turned that depressing, unappetizing gray. Instead, try this: portion the meat into meal-sized amounts, flatten it inside a freezer bag, and then vacuum seal it. The difference is honestly night and day.
Tips for Freezing Liquids
Soups, stews, and sauces bring their own set of challenges. If you just freeze them in a big, rigid container, you're leaving a massive amount of headspace for air to lurk. It’s a recipe for freezer burn.
Here’s a much smarter way to do it:
- Cool Completely: Seriously, don't skip this. Never put hot or even warm liquid in the freezer. Let it chill completely in the fridge first.
- Portion into Bags: Ladle single servings into durable, high-quality freezer bags.
- Freeze Flat: Lay the filled bags flat on a baking sheet and pop them in the freezer. Once they’re solid, you can stack them upright like books. It’s a game-changer for freezer organization.
This little trick not only stops freezer burn dead in its tracks but also makes reheating a total breeze. Just grab a "book" of soup and you're good to go.
Experts from the USDA and other food authorities are all on the same page: proper, moisture-resistant packaging is absolutely key. While a product's original packaging might be okay for a week or two, adding an extra airtight layer is critical for long-term quality. You can find more of their expert recommendations on this topic over at Whirlpool.com.
Mastering Temperature and Location
Let's get one thing straight: your freezer's temperature setting isn't a friendly suggestion. It’s your number one weapon in the fight against freezer burn. You need to lock it in at a frigid 0°F (-18°C) and never look back. Even a few degrees warmer is like sending an open invitation for those nasty ice crystals to crash the party.
Every time you swing open that freezer door, a wave of warm, humid air rushes in. This is enemy number one. The constant temperature fluctuations cause moisture to literally escape your food, leaving it dry and tasteless. A frequently opened freezer is actively betraying the very food it's supposed to protect.
Playing Tetris in Your Freezer for Maximum Freshness
Where you stash your food matters just as much as the temperature. The door is, by far, the warmest spot, getting blasted with room-temperature air every time it’s opened. It’s a terrible neighborhood for anything you actually care about.
Think of your freezer like a strategic map. You have high-value assets and buffer zones.
- The Fortress (Back & Bottom): This is the coldest, most stable part of your freezer. It’s prime real estate. This is where you put the good stuff—steaks, chicken breasts, and that pricey pint of artisanal ice cream you're saving.
- The Danger Zone (The Door): Save this spot for the tough guys. Things that aren't fussy about temperature swings can live here. I'm talking about frozen butter, bags of nuts, or even that bottle of vodka for impromptu cocktails. They can handle the heat, so to speak.
Now, let's talk about the best places to store your food to keep it fresh and free from freezer burn.
Best Freezer Storage Locations
| Freezer Location | Temperature Stability | Ideal Foods to Store Here |
| The Back Wall & Bottom | Highest - Coldest and most protected from warm air. | Meats, poultry, fish, bulk items, and anything you plan to store long-term. |
| The Middle Shelves | Medium - Fairly stable, but can be affected by door openings. | Leftovers, frozen vegetables, and prepared meals. |
| The Door Shelves | Lowest - Most exposure to temperature fluctuations. | Butter, nuts, seeds, alcohol, and other items that are less sensitive to change. |
The key takeaway? Treat the back of your freezer like a vault for your most valuable frozen goods and use the door as a convenient spot for the less-perishable items.
My Two Cents: Try to keep your freezer about three-quarters full. A well-stocked freezer is a happy, efficient freezer. The frozen items act like a team of tiny ice packs, helping maintain the cold even when you have the door open for a minute too long.
The Flash Freezing Secret Weapon
Ever wonder how the pros keep berries from turning into a sad, mushy clump in the freezer? They use a brilliant trick called flash freezing, and you can easily do it at home. It’s perfect for delicate foods like berries, sliced peaches, or even meatballs.
Instead of just dumping them into a bag to freeze into a solid brick, spread them out in a single layer on a baking sheet. Pop the sheet into the freezer for an hour or so until everything is frozen solid.
Once they're rock-hard, you can toss them all into a freezer bag or container. This method freezes each item individually and incredibly fast, which means smaller ice crystals. Smaller crystals cause less damage to the food's structure, so when you thaw those berries, they’ll still look and taste like berries—not a depressing, watery mess.
Organize Your Freezer Like a Pro
Let's be honest, we've all been there. Staring into the icy abyss of a chaotic freezer, rummaging past forgotten bags of who-knows-what, searching for that one specific thing. An organized freezer isn't just about satisfying your inner perfectionist; it's one of your best weapons against freezer burn.
Think of it this way: the less time you spend with the door open, the less warm air gets in. This is where the pros have a trick up their sleeve, and it's brilliantly simple: First In, First Out (FIFO). No fancy equipment needed, just a permanent marker. Slap the date on everything you freeze. When you add new items, tuck them in the back and slide the older stuff to the front. Simple.
This little habit ensures you're grabbing food when it's still at its best, long before those dreaded ice crystals even think about forming.
Grouping and Binning for Efficiency
Ready to take it up a notch? Bins. Seriously, plastic bins are a total game-changer for freezer organization. Start grouping like with like—all your chicken in one bin, beef in another, frozen veggies in a third.
Suddenly, there's no more frantic archeological dig for that bag of peas you swear you bought. You just pull out the "veggie" bin, grab what you need, and pop it back in. The door is closed in seconds. This isn't just about neatness; it's about maintaining a consistently cold temperature.
Minimizing the time your freezer door is open is one of the most effective ways to stop freezer burn. Every second the door is ajar, warm air floods in, causing temperature swings that speed up moisture loss from your food.
That stable, frigid environment is what you're after. Temperature see-saws are what cause the ice crystals that suck the life out of your food. By organizing for quick access and using a simple dating system, you're actively protecting the flavor and texture of everything inside. You can dive deeper into how temperature stability impacts your food with Whirlpool's guide. A few minutes of organization now will absolutely save you from a bland, disappointing meal later.
Secrets from the Commercial Cold Chain
Ever grabbed a bag of frozen peas from the supermarket and marveled at how perfectly green and fresh they look, without a single ice crystal in sight? It’s not a happy accident. That quality is the result of a meticulously managed system known as the commercial cold chain. Think of it as the big leagues of food preservation, keeping food rock-solid frozen from the processing plant all the way to the grocery store.

The pros aren't messing around; they rely on serious science and heavy-duty gear. They use specialized insulated shipping containers and high-tech coolers that offer incredible thermal protection. To keep temperatures from budging, they often turn to dry ice, which maintains a bone-chilling -109.3°F (-78.5°C) without leaving a watery mess. The entire goal is to eliminate temperature swings during transit, which is the mortal enemy of frozen food. You can get a closer look at these powerful cold chain solutions and see how the industry gets it done.
The journey from the supermarket to your freezer is the final, and most critical, link in this chain. It's the one part of the journey where you have total control.
Just think, that food has been on an epic, perfectly frozen journey. The second it hits your shopping cart, you're on the clock. Getting it home and tucked away in your freezer quickly is your new mission. You’re not just putting away groceries; you’re taking the baton and running the final, crucial leg of the cold chain, preserving all that quality the professionals worked so hard to protect.
Got Questions About Freezer Burn? Let's Talk.
Even when you've got your freezer game on point, questions are bound to pop up. We've all been there, staring at a frosty-looking chicken breast and wondering what to do. Let's clear up some of the most common head-scratchers so you can beat freezer burn for good.
First up, the big one: "Is this safe to eat?" You pull out a steak that looks a little... mummified. Good news! You can absolutely eat it. Freezer burn messes with the quality, not the safety. The texture might be a bit tough or dry, but it's perfectly safe.
My go-to trick? Just trim off the discolored, dried-out spots. Or, even better, toss that slightly freezer-burned meat into a soup, a hearty stew, or a chili. The long, slow cooking in liquid will make any textural issues completely disappear.
Does a Full Freezer Really Help?
I get this question all the time. Is a packed freezer better? Yes, it absolutely is—but there's a sweet spot. A freezer that's about three-quarters full is the most efficient. Think of all those frozen items as a big, solid block of cold. When you open the door, they help keep the temperature from fluctuating wildly.
Just don't cram it so full that you can't shut the door. You still need air to circulate, or you’ll end up with weirdly warm spots where nothing freezes properly.
The real secret to delicious frozen food isn't just keeping it cold, it's freezing it fast. The quicker you can freeze something, the smaller the ice crystals will be.
It's actually pretty fascinating science. When you freeze food super fast (ideally at 0°F or -18°C), you create tiny, microscopic ice crystals. Slow freezing, on the other hand, creates large, spiky crystals that shred the food's cell walls. When you thaw it out, all the moisture escapes, leaving you with a mushy, watery mess. If you want to geek out on the science, Whirlpool.com has a great explanation.
So, how long do you really have before freezer burn attacks? Honestly, it all comes down to the food itself and—most importantly—how you wrap it. If you've got something vacuum-sealed and your freezer holds a steady 0°F, you can easily go a year or more. But if you just tossed it in with some flimsy plastic wrap? You could be seeing those dreaded white patches in a matter of weeks.
---
Tired of your meal prep ingredients getting freezer-burned before you can use them? Let Meal Flow AI build a perfect plan around what you have, generating an automatic Instacart list so you only buy what you need, right when you need it. Plan your meals smarter and waste less with Meal Flow AI today.