How to Store Prepped Meals for Lasting Freshness
Learn how to store prepped meals to keep them safe and delicious. Discover pro tips on containers, cooling, and freezing to make your meal prep last.
Love This Article?
Get personalized meal plans with recipes like this, automatically matched to your nutrition targets.

How to Store Prepped Meals for Lasting Freshness
Welcome to the meal-prep club—your future self is going to high-five you. Storing those carefully crafted meals the right way means one thing: consistently fresh, safe, and downright tasty dishes all week long. The recipe for success? Cool your food fast, pick containers that fit each meal, and know exactly how long everything stays at its peak.
Your Guide To Storing Prepped Meals Without The Stress
Let’s be honest—no one wants to discover a wilted salad or mystery meat lurking in the back of the fridge on Thursday. This guide is packed with the real-world hacks I’ve picked up over years of meal prep triumphs (and epic fails).
We’re skipping the jargon and skipping straight to what works. Think of this as your personal blueprint to effortlessly store food so you can spend less time worrying and more time enjoying.
What You Will Learn
- Choosing Containers That Click: From tempered glass to BPA-free plastics, find out which vessels suit your soups, salads, and stir-fries best.
- Rapid Cooling Tricks: Simple moves to zap heat fast and keep bacteria at bay.
- Shelf-Life Savvy: Concrete timelines for fridge and freezer so you never second-guess a meal.
- Freshness Level-Up: Techniques like ingredient separation and vacuum sealing to preserve crunch and flavor.
Before you dive deeper, here’s a quick cheat sheet to keep on your fridge door:
Quick Rules for Safe Meal Prep Storage
| Action | Why It Matters | Quick Tip |
| Cool Foods Quickly | Prevents bacterial growth | Spread in shallow trays for faster chill |
| Pick Airtight Containers | Locks in freshness and avoids leaks | Glass works great for reheating |
| Label Everything | Tracks age and contents | Use erasable fridge markers |
| Mind Storage Times | Ensures you eat before spoilage | Set a reminder on your phone |
Keep this chart close and your meal prep will thank you later.
By the end of this guide, you won’t just store meals—you’ll have a streamlined system that slashes waste, saves time, and turns every grab-and-go bite into a home-cooked treat.
Ultimately, it’s about fitting these principles into your routine. Whether you’re cooking for one or planning for a crowd, these strategies will fill your fridge with ready-to-eat meals that taste as good on Day 4 as they did fresh off the stove.
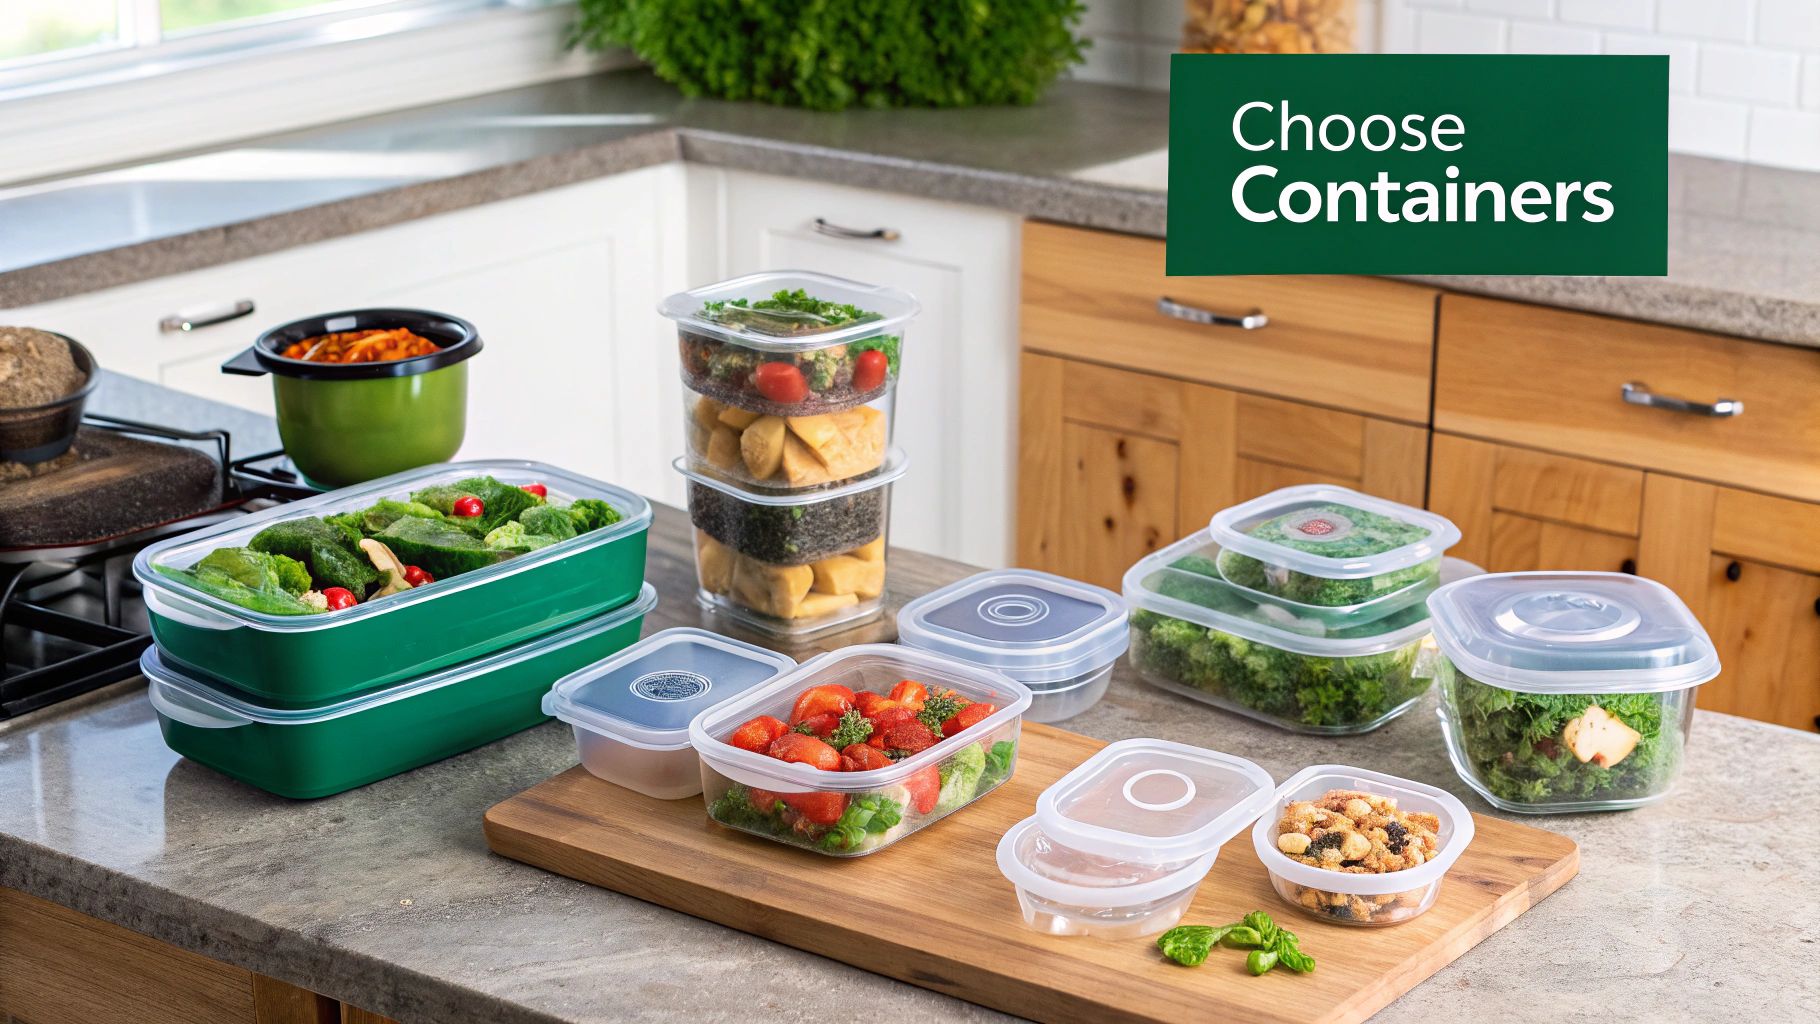
Choosing Your Meal Prep Storage Champions
Let's be real—your meal prep container is the unsung hero of your kitchen. It's the loyal sidekick protecting your hard-earned deliciousness from the dreaded forces of sogginess and spoilage. Picking the right one isn't just about finding a box with a lid. It’s about strategy.
The container you’d use for a hearty, microwave-bound lasagna is totally different from what you’d grab for a crisp, on-the-go salad. So, let’s get into the main contenders and figure out which ones deserve a spot in your cupboard.
Glass Containers: The Heavyweight Champion
For a lot of meal prep pros, glass is the gold standard, and for good reason. Glass is non-porous, which is a fancy way of saying it won’t hold onto stains or smells. That means last week’s chili won't haunt this week’s yogurt parfait. Total win.
They’re also beasts of versatility—you can pop them in the oven, microwave, and dishwasher without a second thought. But, they aren’t perfect. Glass is heavy, which can be a pain if you’re lugging a few meals around all day. And, well, it breaks. If you've got a clumsy streak (no judgment, we’ve all been there), this is something to keep in mind.
Pro Tip: Keep an eye out for borosilicate glass. It’s much more resistant to thermal shock, so you can go from fridge to microwave without worrying about it cracking under pressure.
Plastic Containers: The Lightweight Traveler
When you’re on the move, nothing beats a good BPA-free plastic container. They’re light as a feather, stack beautifully, and are usually much kinder to your wallet than glass. They're the obvious choice for packed lunches, snacks for the kids, or that salad you’re taking to the gym.
The downside? They can get stained and hold onto odors, especially from anything with tomato sauce. Over time, they can also warp from too many trips through the microwave or dishwasher. Just make absolutely sure they are labeled BPA-free, as you don't want any weird chemicals messing with your food.
This push for safer materials is a big deal. People are wising up and demanding packaging that's reusable, sustainable, and free from funky chemicals. It aligns perfectly with the whole point of meal prep: keeping your food fresh and your body healthy. If you’re a nerd for market trends like this, you can dive deeper into what’s driving this shift over on Towards Packaging.
Stainless Steel And Silicone: The Specialists
Glass and plastic get most of the attention, but don’t sleep on the specialists. Stainless steel and silicone have some cool perks of their own.
- Stainless Steel: These things are practically indestructible, super lightweight, and won't leach anything into your food. They are fantastic for cold items like salads, sandwiches, or fruit. The major dealbreaker for many, though, is that most are not microwave-safe.
- Silicone: You'll often see these as collapsible bowls or reusable bags. They're incredibly flexible, save a ton of storage space, and are generally safe for the microwave and dishwasher. They’re perfect for snacks and smaller portions.
Honestly, the smartest move is to build a mixed arsenal of containers. Use your trusty glass containers for meals you'll be reheating at home or in the office, and grab a lightweight plastic or stainless steel option for cold lunches and days on the go. That way, you’re always ready for whatever deliciousness you’ve cooked up.
The Art of Cooling and Storing Without Spoilage
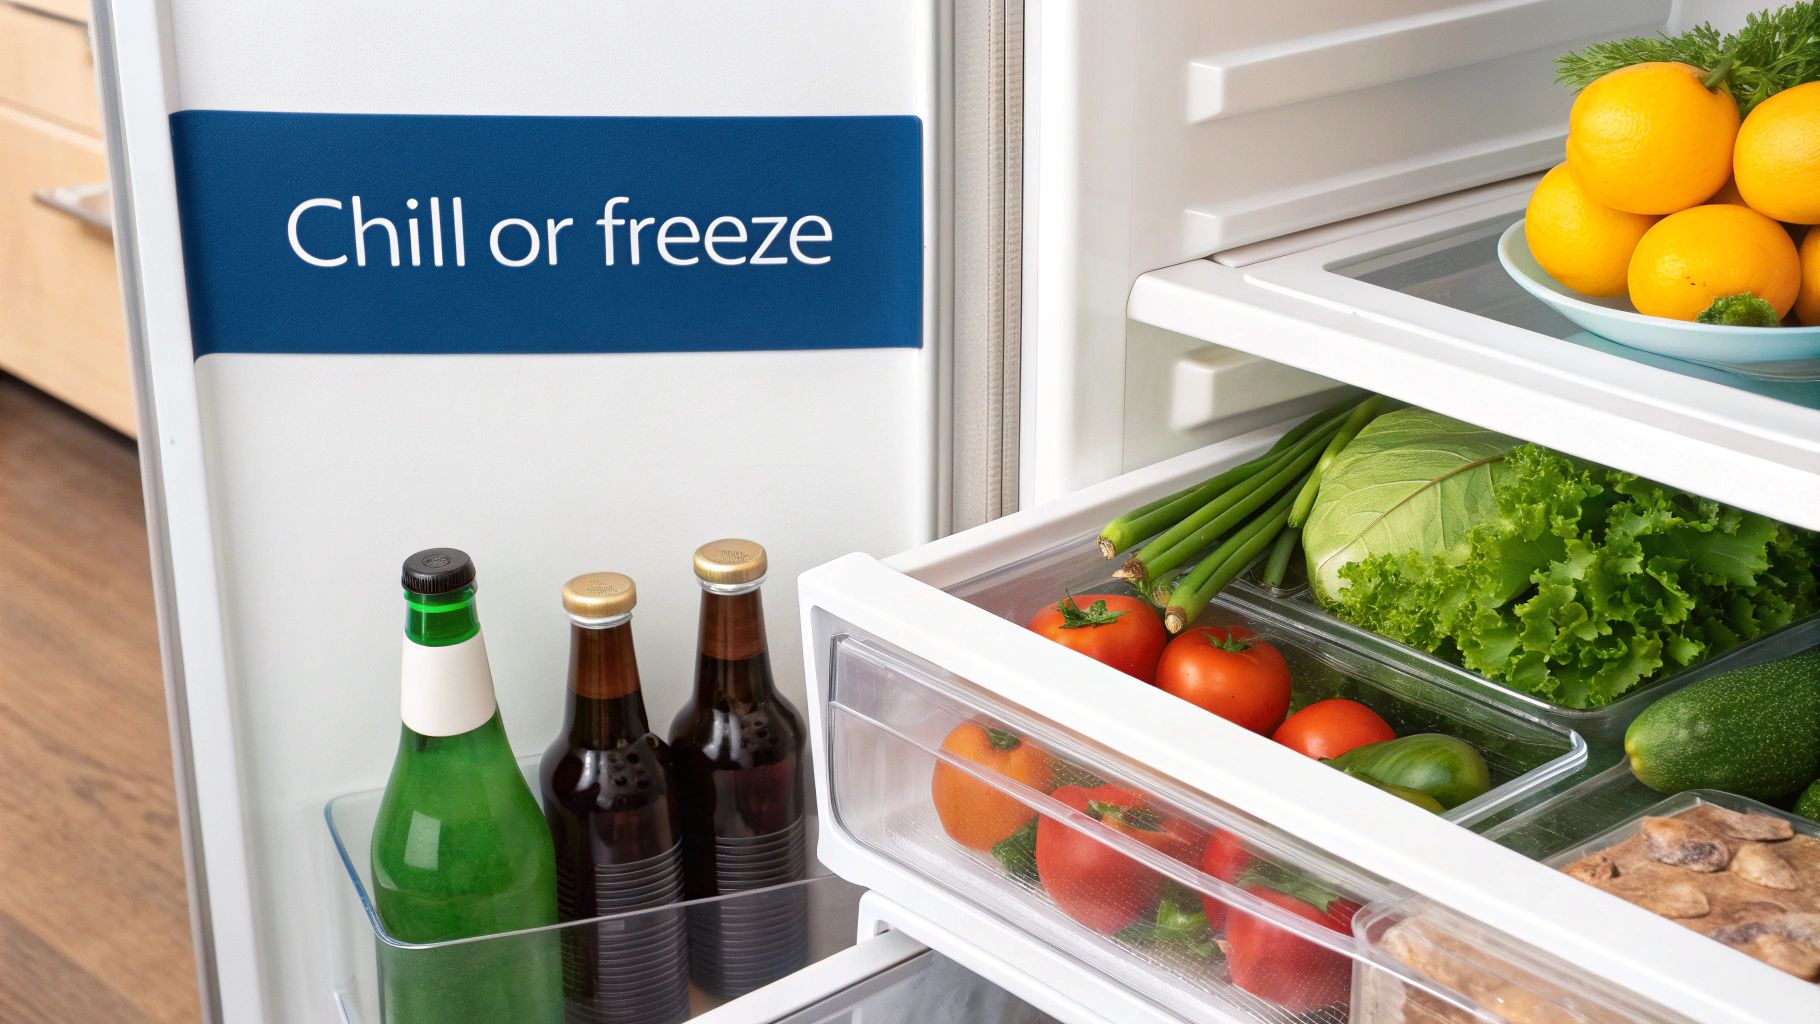
Meal prep can feel a bit like a chemistry experiment, but nailing the cool-down process is where the magic happens. When your food sits between 40°F and 140°F (4°C to 60°C), bacteria kick off an all-you-can-grow buffet—and trust me, you don’t want that on your watch.
Your goal? Zap that heat faster than you’d scarf down a taco. Avoid cramming a piping-hot casserole into the fridge—think of it as introducing a mini heater to an icy party. Instead, let’s explore ways to ditch the danger zone without breaking a sweat.
Beat The Heat With Rapid Cooling Tricks
When I’m racing against time after Sunday meal prep, these tactics are lifesavers:
• Baking Sheet Spread: Got grains or roasted veggies? Dump them in a single layer on a rimmed sheet pan. The thin blanket of food chills in minutes, not hours.
• Ice Bath Plunge: Big pot of soup? Set it in a sink filled with ice water. Give it a stir here and there to even out the chill. Voilà—your stew will be fridge-ready in no time.
• Divide and Conquer: Instead of one giant container, portion into smaller, shallow vessels. Each batch sheds heat faster, so you avoid that lukewarm “danger zone” hangout.
Key Takeaway: Aim to get your dishes below 40°F within two hours. It’s by far the simplest trick for safe, week-long meal prep.
Fridge Tetris For Optimal Freshness
Cramped quarters in your fridge? That’s a bacterial VIP lounge waiting to happen. Give each container some breathing room so cold air can dance around.
And while you’re stacking those Tupperwares, keep shelf life in check. Here’s a quick cheat sheet:
| Food Type | Recommended Fridge Storage |
| Cooked Meat, Poultry, and Fish | 3-4 days |
| Roasted Vegetables and Cooked Beans | Up to 5 days |
| Cooked Grains (Rice, Quinoa) | 4-6 days |
| Soups and Stews | 3-4 days |
Finally, trust your nose (and eyes). If something smells funky or looks off, ditch it. A well-chilled, well-organized fridge is your battle plan against meal prep mishaps.
Mastering the Freezer for Long-Term Meal Prep
Think of your freezer as a culinary time capsule. When you get it right, it's the secret to pulling a perfectly delicious, home-cooked meal out of thin air on a busy Tuesday night. But get it wrong? You’re left with a frosty, flavorless brick that's more science experiment than dinner. Let's make sure your future self thanks you.
The trick is knowing what belongs in that time capsule and what doesn't. Your freezer absolutely loves hearty, dense foods. We’re talking soups, stews, chilis, rich pasta sauces, and casseroles. Cooked grains like quinoa and rice also freeze like a dream. On the other hand, some foods just fall apart in the cold.
This handy guide shows you just how much of a game-changer your freezer can be.
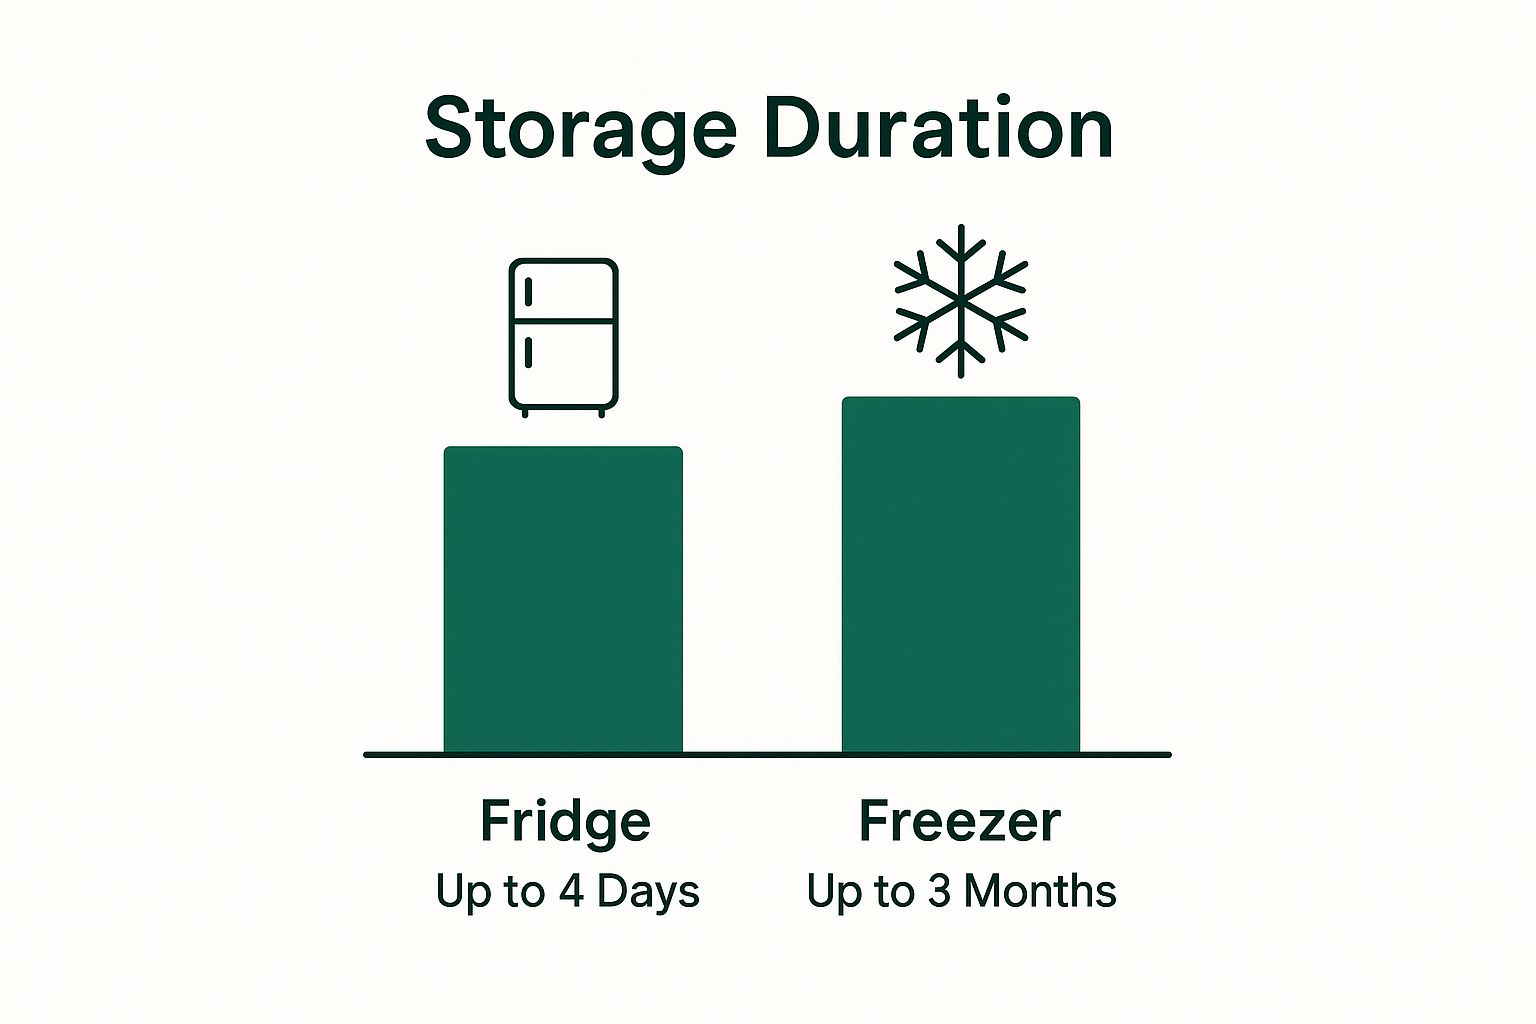
As you can see, we're talking about extending the life of your meals from a few days to a few months. That’s a serious upgrade for anyone trying to get ahead of the dinner-time scramble.
Dodging Freezer Burn and Other Frozen Fails
The absolute arch-nemesis of your beautifully prepped food is air. Air is what causes that dreaded freezer burn—those gross, grayish, leathery patches that suck the life and flavor right out of your meal.
Winning the war on air is all about creating an airtight seal. Here’s how you do it:
- The Double-Wrap Method: For things like individual burritos, meatballs, or a mini meatloaf, the double wrap is your best friend. Wrap it super tightly in plastic wrap first, then pop that into a freezer-safe zip-top bag. Squeeze every last molecule of air out before you seal it shut.
- Give Liquids Some Breathing Room: When you're freezing soups, stocks, or sauces, always leave about an inch of headspace at the top of the container. Liquids expand as they freeze, and if you don't give them room, you’ll come back to a cracked container and a soupy mess.
- The Pro Move: Vacuum Sealing: If you're really committed to long-term freezer storage, a vacuum sealer is worth its weight in gold. It pulls out virtually all the air, keeping your food pristine for an astonishingly long time.
Here's the golden rule of freezing: Always, always, always cool your food completely before it even thinks about going into the freezer. Sticking hot food in there raises the ambient temperature, which can partially thaw neighboring items and create a perfect storm for ice crystals and funky bacteria.
To make this easier, here’s a quick-reference chart on what freezes beautifully and what you should just eat now.
Freezer-Friendly vs. Freezer-Fail Foods
| Freezes Well (And Why) | Avoid Freezing (And Why) |
| Soups, Stews, Chilis: Their liquid base protects the ingredients from drying out. Flavors often deepen after freezing! | Creamy Sauces & Dairy: Cream, yogurt, and milk-based sauces often separate and become grainy when thawed. |
| Cooked Meats & Poultry: Pulled pork, shredded chicken, and meatballs hold their texture and moisture perfectly. | High-Water-Content Veggies: Cucumbers, lettuce, and raw tomatoes turn into a mushy, watery mess. Their cell walls burst when frozen. |
| Cooked Grains & Beans: Rice, quinoa, lentils, and chickpeas freeze and reheat beautifully, making them a perfect meal-prep base. | Fried Foods: That crispy coating you worked so hard for will become a soggy, sad mess upon thawing. |
| Baked Goods: Muffins, breads, and cookies freeze wonderfully. Just wrap them well to prevent them from getting stale. | Raw Potatoes: They can develop a strange, mealy texture and a sweet taste after being frozen raw. Cook them first! |
Basically, if it’s hearty and holds its structure well, it’s probably a good candidate for the freezer. If it’s delicate, creamy, or crunchy, you might want to reconsider.
The Art of the Thaw
How you bring your meal back to life is just as critical as how you put it to sleep. The safest and best way is the slow and steady thaw. Just move your meal from the freezer to the fridge a day or two before you plan to eat it. This keeps the food out of the temperature "danger zone" where bacteria loves to party.
Once it's thawed, reheat it with a little care. Soups and stews are fantastic reheated gently on the stovetop. Casseroles and baked dishes love a little time in the oven to get warm and toasty again. The microwave is fine in a pinch, but use a lower power setting and stir a few times to avoid creating rubbery hot spots and icy cold centers. A little splash of broth or water can work wonders to rehydrate grains and meats.
Mastering these techniques is what allows the entire meal kit delivery industry, a market projected to hit USD 18.83 billion in 2023, to function. They rely on flawless freezing and storage to get fresh food from their kitchen to your door. You can learn more about how storage technology is powering the meal delivery boom to see how the pros do it on a massive scale.
Advanced Techniques for Peak Freshness and Flavor
You’ve mastered the basics—now it’s time to step up your game. These tweaks aren’t dramatic overhauls; they’re tiny shifts that unlock big wins in taste and texture by day four.
Think less “stack and forget” and more “assemble when you’re ready.” A little planning goes a long way.
Embrace Smart Separation
Keeping wet ingredients away from dry ones is the golden rule. It’s not just salads—this idea transforms virtually any meal prep.
- Taco Bowls: Store seasoned meat in one container and lettuce, cheese, and salsa in another. Mix just before eating so every bite stays crisp.
- Grain Bowls: Pack cooked quinoa or rice separately from roasted veggies. Tie in your dressing or sauce in a leak-proof jar.
- Crunchy Toppings: Stash croutons, nuts, or crispy chickpeas in a mini bag. Sprinkle them on top when you’re ready to dig in.
“I always do yogurt parfaits this way: fruit on the bottom, yogurt next, and granola in its own little pot. It takes ten seconds to assemble, and breakfast feels fresh every time.”
Revive And Refresh With Finishing Touches
Even a well-stored meal can lose its spark. A quick flourish just before serving brings everything back to life.
- A drizzle of fresh lemon or lime juice over chicken or fish
- A handful of chopped herbs like parsley or cilantro for color and aroma
- A swirl of quality olive oil or a dash of hot sauce to amp up the flavor
This approach borrows from pro kitchens. The global prepared meals market uses High-Pressure Processing (HPP) to extend shelf life by two to three times—no chemicals required. While you won’t have an HPP machine in your kitchen, you can adopt their mindset: preserve the core and brighten it up at the last minute. Discover more in the prepared meals market report.
Your Top Meal Prep Storage Questions, Answered
You’ve done the hard work—the chopping, the cooking, the portioning. Now comes the crucial part: storing it all so it’s still delicious and, more importantly, safe to eat days later. Let's tackle some of the most common questions that pop up once the cooking is done.
How Long Are My Prepped Meals Really Good For?
This is the big one, right? You don't want to play a guessing game with your food. The honest answer is, it depends on what you made.
Generally, you can count on cooked proteins like chicken, beef, or fish to be at their best for about 3-4 days in a fridge that's doing its job. Think of that as your go-to window for most meat-based dishes.
Things like grains, beans, and roasted veggies are a bit more forgiving. They can often hang out safely for up to 5 days, especially if they were super fresh when you cooked them. Anything with a high acid content, like a hearty tomato-based chili, gets a slight edge—the acidity naturally slows down bacterial growth, sometimes stretching its life to 4 days.
Here’s my non-negotiable rule: get those meals into the fridge within 2 hours of cooking. Any longer, and you're inviting bacteria to a party you definitely don't want to attend.
A few pro tips I've learned along the way:
- Use shallow containers. They help food cool down way faster, getting it out of the temperature "danger zone" quicker.
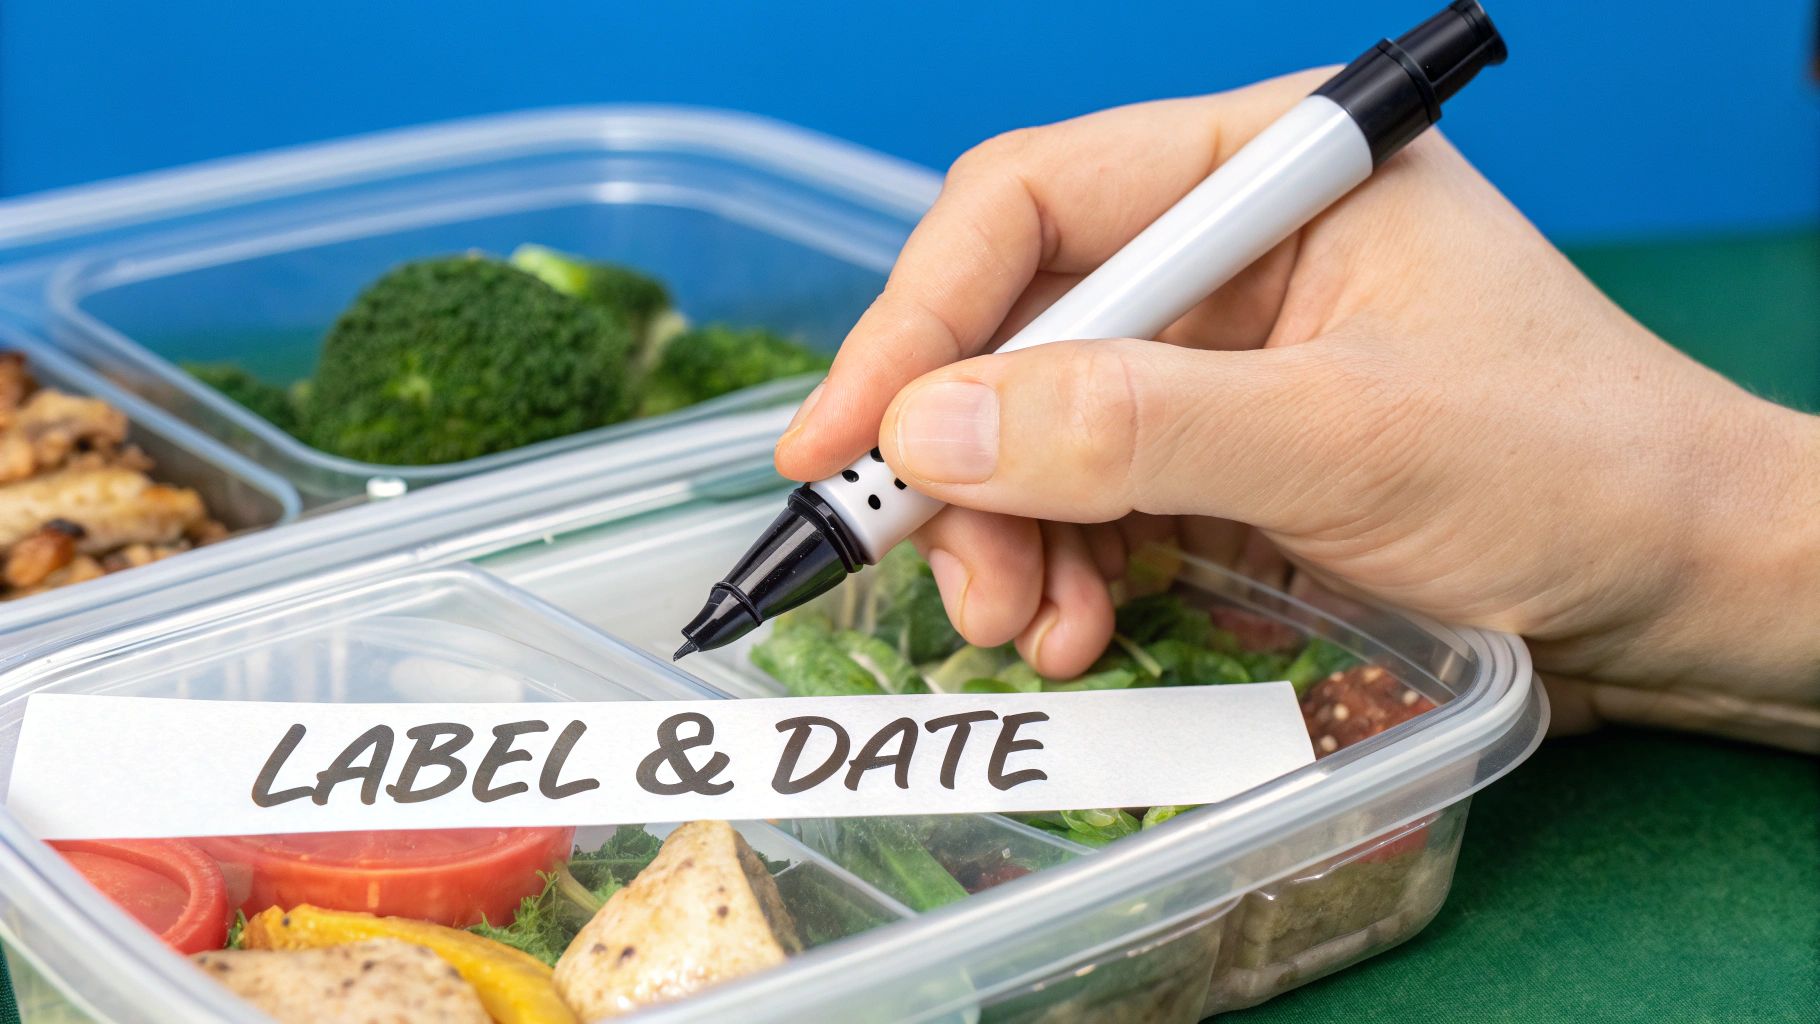
- Slap a label on it! Just a quick note with the dish name and the date you made it saves you from future guesswork.
- If you've mixed ingredients, go by the one that spoils the fastest. For example, if you have a pasta salad with chicken and dairy-based dressing, the chicken and dressing set the timeline, not the pasta.
Can I Reheat My Meal Preps More Than Once?
I'm going to give you a hard "no" on this one. It’s a food safety minefield. Every time you cool and reheat food, you're giving bacteria a fresh chance to multiply. Why risk it?
The real secret is to portion your meals into single-serving containers before they ever see the inside of your fridge. That way, you only ever heat up what you’re about to eat. Simple.
"Never put a full week's worth of lasagna in the microwave twice," advises food safety expert Jenna Mills.
When you do reheat, make sure it gets piping hot all the way through—a food thermometer should read 165°F. This is especially important for dense stuff like casseroles or thick stews where cold spots can hide.
To get the best (and safest) reheat:
- Stir your food halfway through to make sure the heat gets distributed evenly.
- Cover the container to trap steam, which helps heat the food and keep it from drying out.
- Never stack containers in the microwave; it’s a recipe for uneven heating.
And if something smells or looks even a little bit funky after a reheat? Don't be a hero. Just toss it.
Help! My Prepped Salads Are Always Soggy. What Gives?
Ah, the dreaded soggy salad. We've all been there. The culprit is almost always moisture where it shouldn't be, for too long.
The number one mistake is adding the dressing too early. Dressing is the enemy of crisp lettuce. Your best bet is to store it separately in a tiny container or jar and only add it right before you dig in.
This is where the magic of the layered mason jar salad comes in. It’s not just for Instagram; it’s a brilliant method for keeping everything separate and fresh.
| Layer Order | What Goes Inside |
| Bottom | Dressing, pickled veggies |
| Middle | Hard veggies, grains, proteins |
| Top | Leafy greens, crunchy toppings |
When you build your salad this way, the wet ingredients stay quarantined at the bottom, and the delicate greens on top stay perfectly crisp. Just give it a good shake when you're ready to eat, and voilà!
A couple more tricks I swear by:
- Keep your crunchy toppings like nuts, seeds, or croutons in a separate little baggie until serving time.
- If you’re packing greens in a container, a paper towel tucked inside can work wonders to absorb extra condensation.
---
Simplify your meal planning with Meal Flow AI and get back to enjoying your food, not just making it. Check us out at https://mealflow.ai and see how easy it can be.